Quick-Start Guide
VIAME (Video and Image Analytics for Multiple Environments) is a do-it-yourself AI system for analyzing imagery and video, primarily targeting marine species analytics but also useful as a general computer vision toolkit.
Important Links
Main website: https://www.viametoolkit.org/
GitHub: https://github.com/VIAME/VIAME
Bug reporting: https://github.com/VIAME/VIAME/issues, https://github.com/Kitware/DIVE/issues
Additional Discussion: https://discourse.kitware.com/c/viame-dive
Tutorial videos: https://www.youtube.com/channel/UCpfxPoR5cNyQFLmqlrxyKJw
Additional Help Contact: viame-web@kitware.com
There are 5 types of documentation: this quick-start guide, tutorial videos, user forums, example readmes, and the full manual. Installers (pre-built binaries), docker images, and source code are hosted on GitHub. Pre-built binaries are for users, while the source code and build instructions are for developers.
VIAME Flavors
VIAME comes in a few different interfaces with slightly different capabilities. Some interfaces are deprecated (e.g. VIEW) in favor of newer replacements (DIVE), though will still remain as an option for a few specialized cases, just not developed significantly further. Not listed in this document thoroughly are programming APIs for developers.
DIVE – Web and Desktop Annotator
Originally created as the VIAME-Web interface (with a public server hosted at https://viame.kitware.com), a desktop version of this web annotator and model trainer is also available in both Windows .msi installers and .zip release formats.
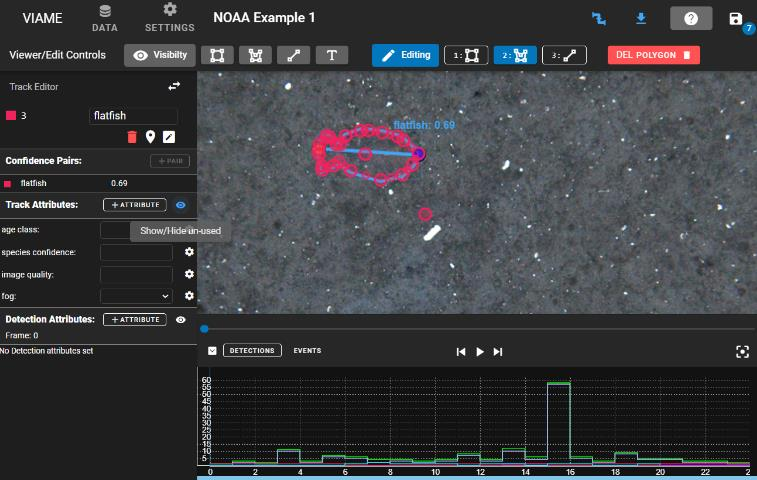
This tool is currently the most general purpose annotator, and supports polygons, lines, points, or boxes, and can train models over multiple videos or image sequences using standard models.
SEAL – Multi-Model Desktop Annotator
Supports annotating detection or track boxes in multiple camera views simultaneously. If a transformation is loaded mapping pixels from one view to the other (e.g. boxes created in one camera view will show up in the other). Supports 2-4 cameras side-by-side in the viewer. Can only train models on one sequence from one camera at a time.
SEARCH – Standalone Search Tool
An older tool, used explicitly for image/video search and rapid model generation through a procedure called iterative query refinement (IQR), wherein the user provides an exemplar of what they’re looking for then the system provides new results for the user to accept or reject. While this is happening, a simple model is trained for the query which can be saved out and re-used in annotators.
VIEW – Original Desktop Annotator
Original VIAME desktop annotator for generating either detection or track-level annotations (boxes or polygons). Contains many optimizations for annotating and running pipelines on large (high resolution) imagery. Coded in C++ for efficiency. Can only train models over a single video or image sequence, with limited model selection. Some users prefer its style of track annotation or use it on high resolution clips.
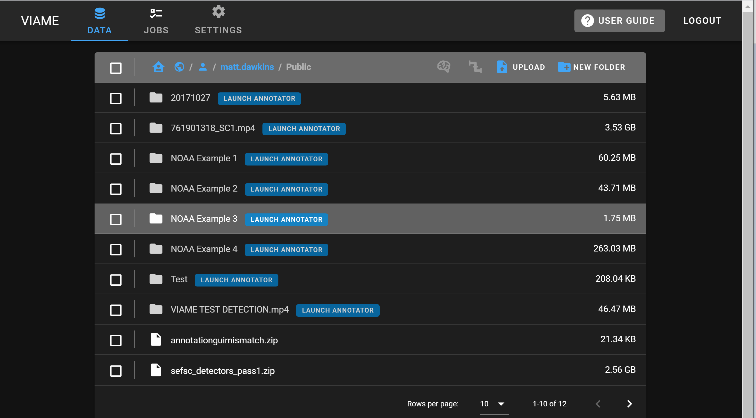
Project Files
Project files are a collection of scripts targeting either groups of images or videos. They are documented later on in this guide. Project files are also used to launch some of the annotation GUIs in the desktop version of the software, or to train models across multiple sequences headless (without a GUI) to prevent the GUI from using any system resources while training, e.g. VRAM, reserving more for the training process.
Example Folders
In the “examples” folder of a VIAME install are a series of standalone .bat (Windows) or .sh (Linux) launchers broken down based on functionality covering all aspects of the system.
Capabilities Breakdown
Legend: Y = Full Support, P = Partial Support, ~ = Planned, N = No Support, via = Available through Example/Project Files
Feature |
Example Files |
Project Files |
VIEW |
SEARCH |
SEAL |
DIVE |
|---|---|---|---|---|---|---|
Runnable from Desktop Installers on Local Desktop |
Y |
Y |
Y |
Y |
Y |
Y |
Runnable Remotely over RDP (Windows) or VNC (Linux) |
Y |
Y |
Y |
Y |
Y |
Y |
Runnable in Web Browser using Remote Server |
N |
N |
N |
N |
N |
Y |
Windows .zip / Linux .tar.gz Installations Provided |
Y |
Y |
Y |
Y |
Y |
Y |
Windows .exe / .msi Installers Provided |
Y |
Y |
Y |
Y |
Y |
~ |
Docker Instances Provided |
Y |
Y |
N |
N |
N |
Y |
Feature |
Example Files |
Project Files |
VIEW |
SEARCH |
SEAL |
DIVE |
|---|---|---|---|---|---|---|
Standard box-level annotation support in GUI |
via |
via |
Y |
P 1 |
Y |
Y |
Polygon-level annotation support in GUI |
via |
via |
N |
N |
N |
Y |
Pixel-mask annotation support in GUI |
N |
N |
N |
N |
N |
Y |
Key-point annotation support in GUI |
via |
via |
P 2 |
N |
N |
Y |
Joint annotation across 2 to 4 cameras simultaneously |
N |
N |
N |
N |
Y |
~ |
Detection model training on single sequence or video |
N |
Y |
Y |
P 3 |
Y |
Y |
Detection model training on multiple sequences or video |
N |
Y |
N |
P 3 |
N |
Y |
Ability to run arbitrary detection or tracking pipelines |
Y |
Y |
Y |
N |
Y |
Y |
Ability to run detection pipelines on multiple cameras |
P |
Y |
N |
N |
Y |
N |
Ability to perform image search and iterative refinement |
via |
via |
N |
Y |
N |
~ |
Annotation support on very large images in GUI |
via |
via |
Y |
N |
P 4 |
P 4 |
Annotation support on images of varying resolutions |
via |
via |
Y |
N |
N |
Y |
Ability to run stereo measurement pipelines |
Y |
Y |
N |
N |
P 5 |
Y |
Ability to run image enhancement under the hood |
Y |
Y |
Y |
Y |
Y |
Y |
Ability to output enhanced images |
via |
Y |
N |
N |
N |
Y |
Ability to output mosaiced images |
Y |
Y |
N |
N |
N |
N |
Automatic scoring and evaluation of detections |
Y |
P |
N |
N |
N |
~ |
GPU vs CPU Installations
VIAME is designed to run on 8 Gb+ VRAM NVIDIA Graphics cards (1 or more), but:
Many algorithms can run with less and a generic 4 Gb patch is available on the install page
Also depends on if talking about just inference (pre-trained model running, uses less) or training
This is just for algorithms and processing pipelines; annotation GUIs can be run on CPU
Additionally:
Some algorithms are meant to run on CPU (motion tracker, baseline pixel classification)
Some algorithms are meant to run on GPU, but can run on CPU (deep frame classification)
Some are designed for GPU, and can run on but take forever on CPU (most deep CNN detectors, many deep learning training routines)
How do I know if I have a GPU?

On Windows, look in Device Manager. Sometimes computers have more than one card (one embedded
on the motherboard, then a 2nd in a plugin slot). Next, search for the card to know its
specifications. On Linux, many terminal commands can tell you which GPU you have (e.g.
nvidia-smi, lspci | grep -i nvidia).
Types of Annotation and Detection Models
There are four main types of annotations and detection models:
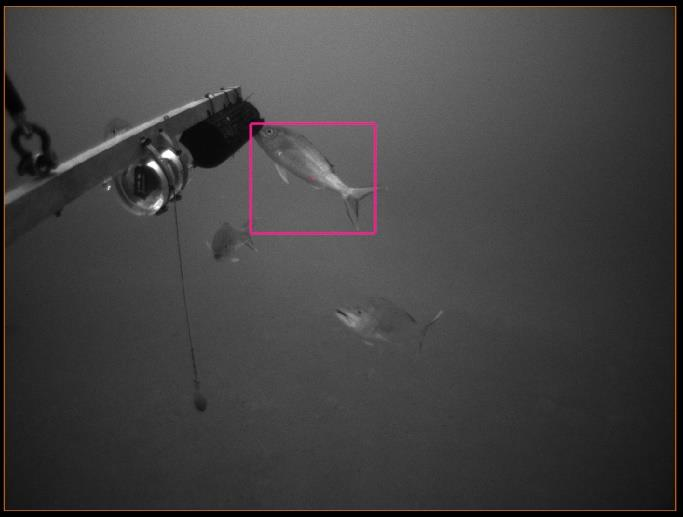
Box-Level: A bounding box around the object of interest. |
Frame-Level: The entire frame is classified (e.g. the whole image has a label). |
Pixel-Level: Pixel masks or polygons tracing the exact outline of objects. |
Keypoints: Specific points of interest on objects (e.g. head, tail). |
Detections vs Tracks
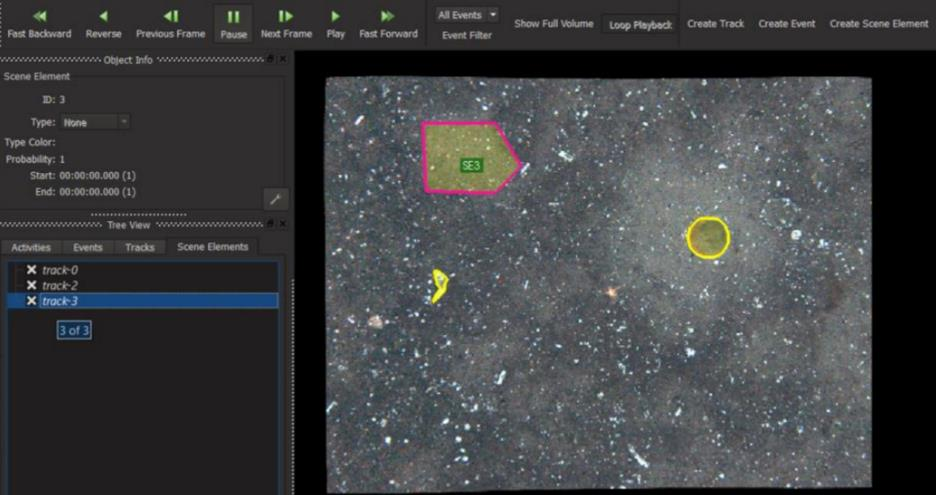
Detections and tracks are synonymous across examples and user interfaces. A track is a (temporal) sequence of single-frame detections, but a detection can also be viewed as a track with just a single state.
Detection |
Track |
Annotation Formats
For details on annotation file formats, see the Detection File Conversions section.
VIAME-CSV is the primary input/output format supported by default, with a single line for either each detection, or each detection state in a track. It has 9 required fields comma separated, with optional additional columns for keypoints, attributes, polygons, and masks.
COCO JSON adaptation is also supported by some GUIs, with added track support.
Annotation Best Practices
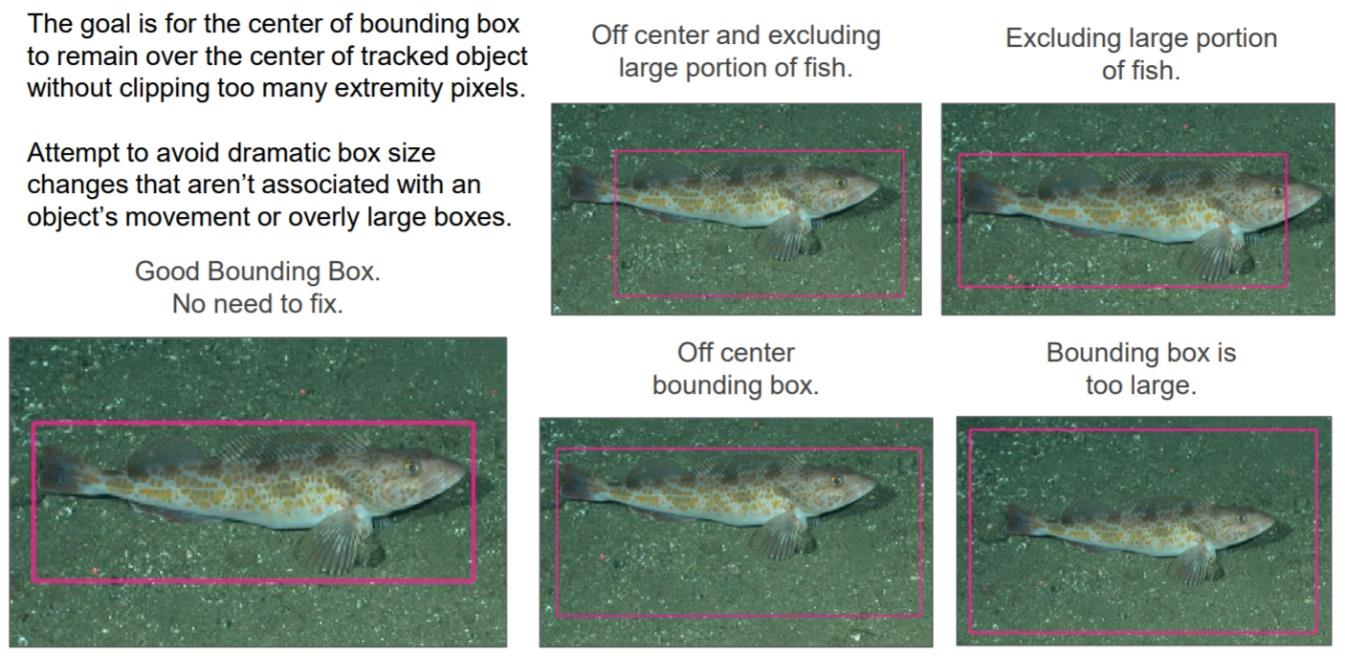
When creating bounding box annotations:
The goal is for the center of bounding box to remain over the center of the tracked object without clipping too many extremity pixels
Attempt to avoid dramatic box size changes that aren’t associated with an object’s movement or overly large boxes
Need to consider efficiency (time) vs quality tradeoffs when deciding to do boxes vs pixel masks, box quality, keypoints + boxes, etc.
3 Core Model Training Workflows
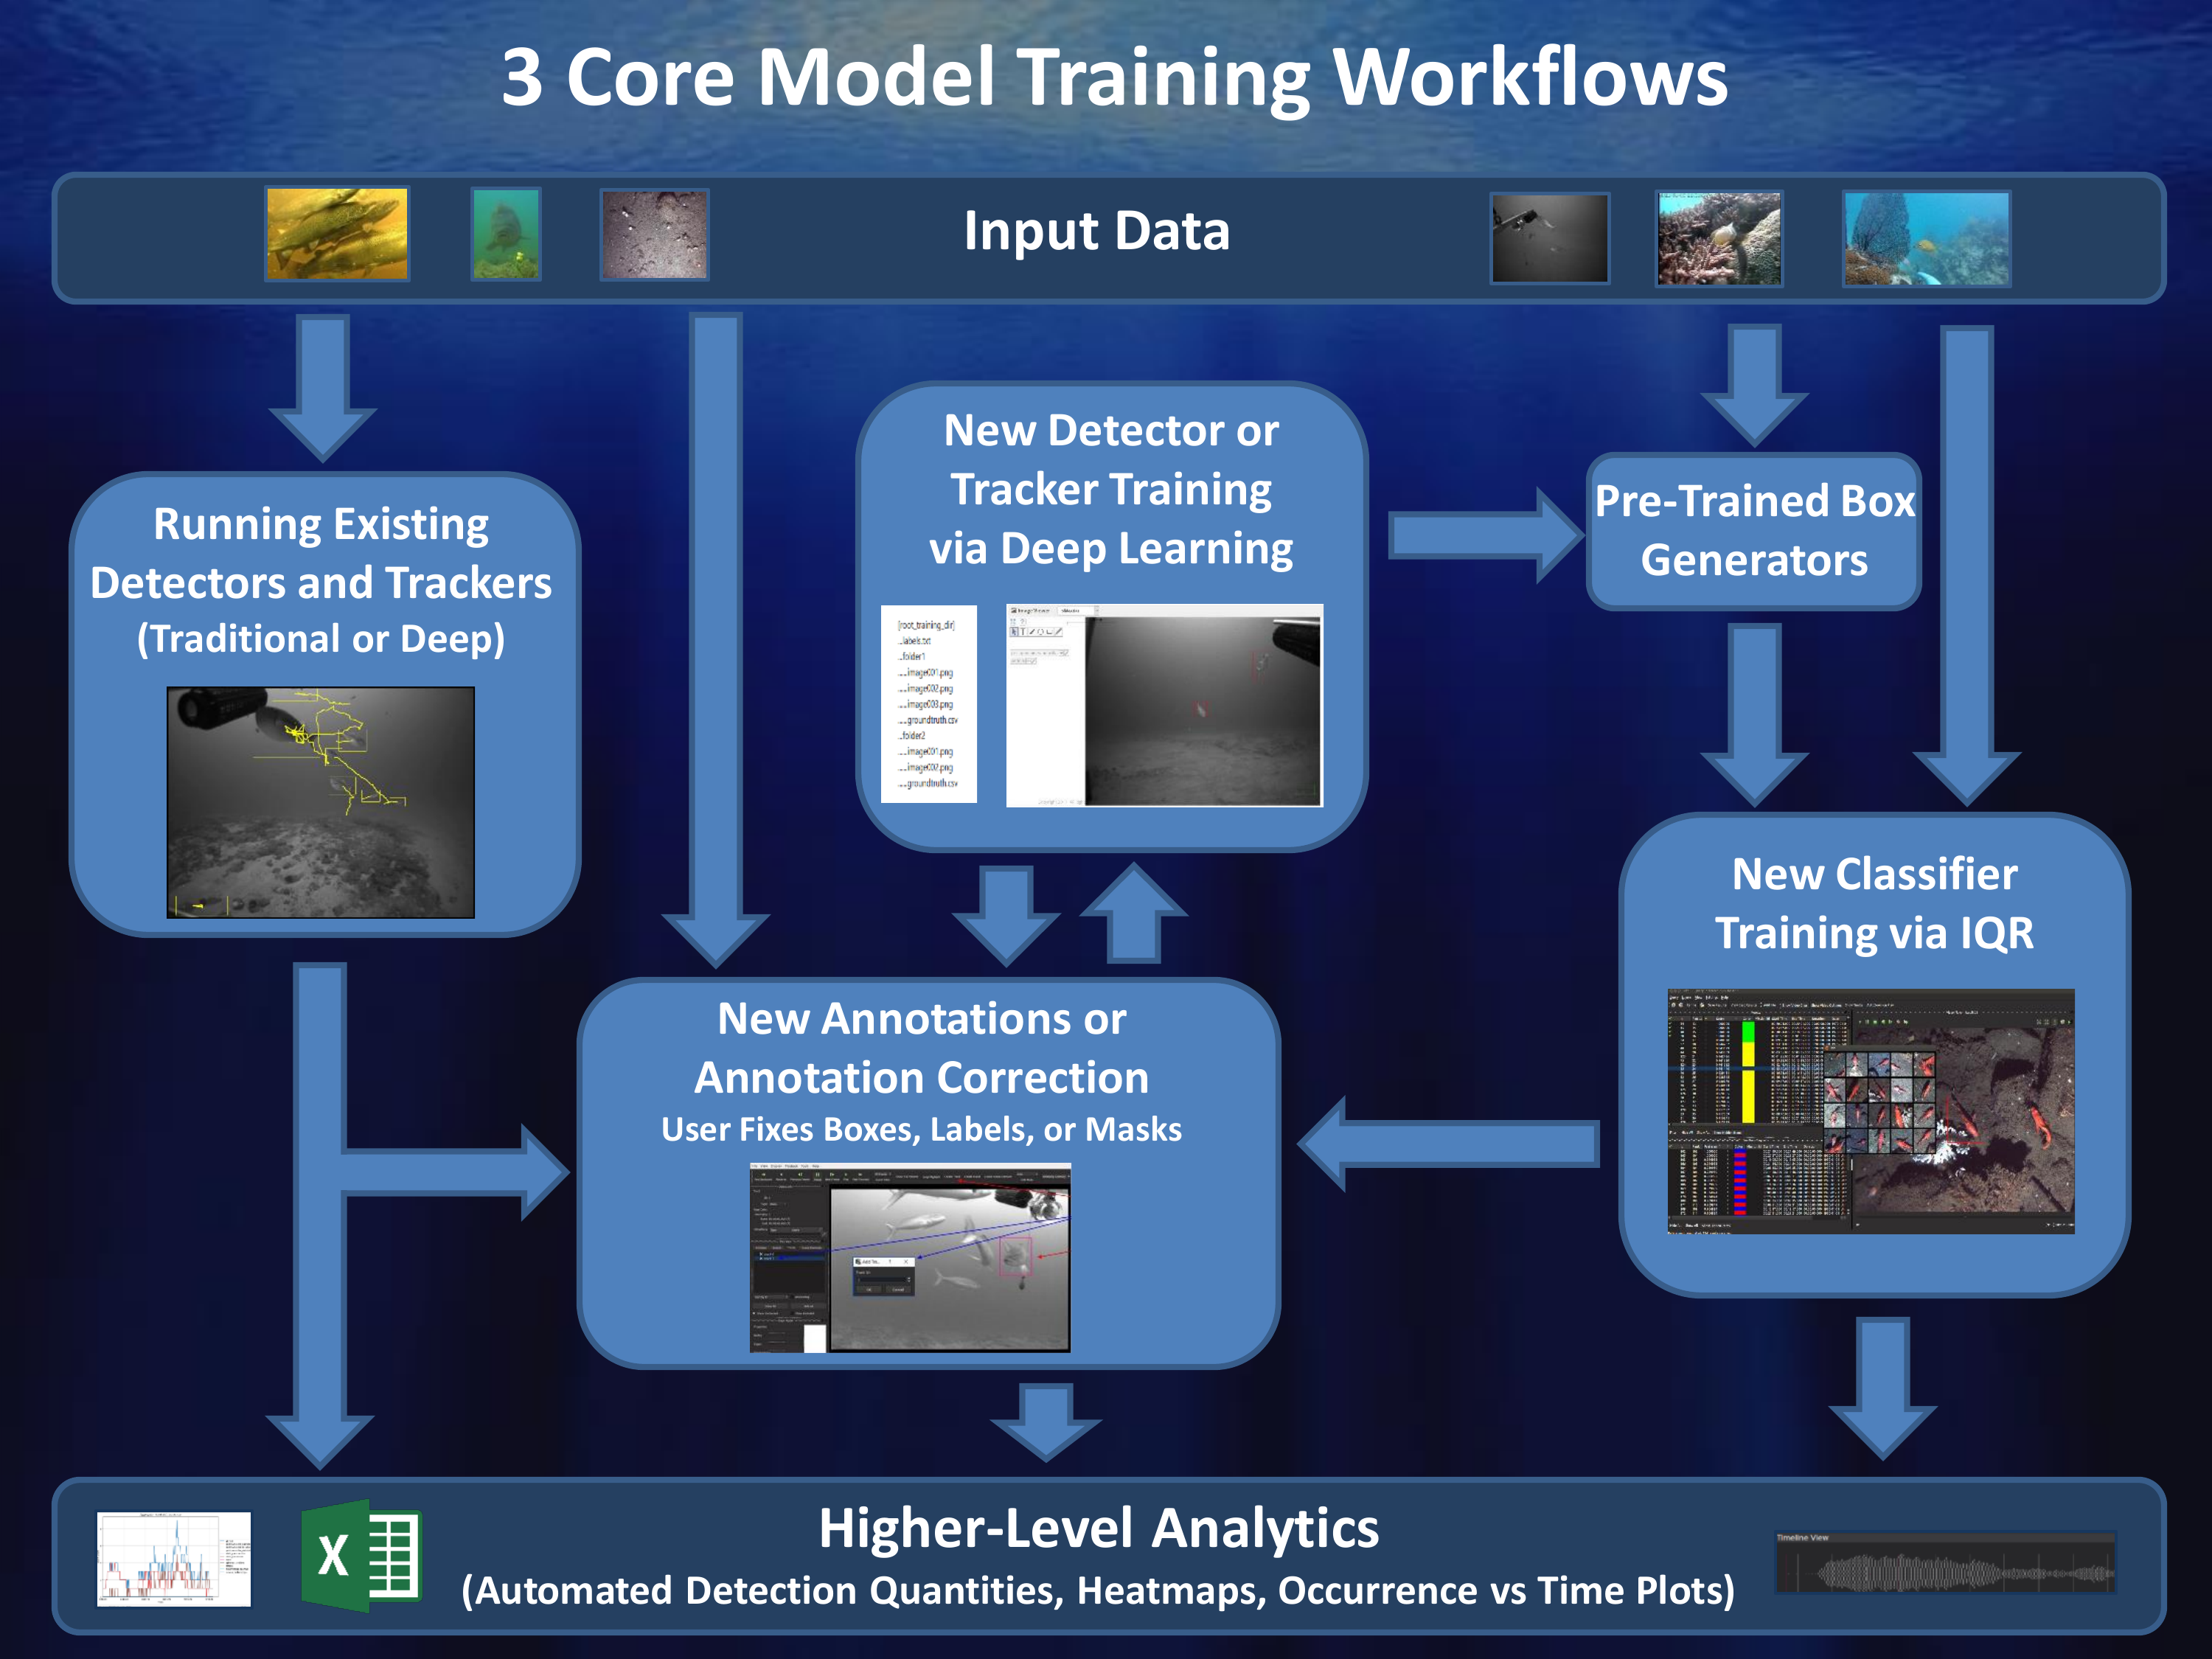
Workflow #1: Traditional Deep Learning from Scratch
Pros: Models perform better than most other solutions when trained with enough training data.
Cons: Requires a large amount of training data and user time to generate it.
Workflow #2: Deep Learning with Partial Automation
Pros: Can speed up annotation if automated detector is decent enough.
Cons: If automated detector is poor it can take more effort to correct automated outputs instead of doing annotations from scratch.
Workflow #3: IQR (Video Search with Adjudication) for Rapid Model Generation
Pros: Can be done with very little user effort, mostly computer runtime. Can be used to rapidly generate models for new classes.
Cons: GUI generally crashes after about 6 iterations due to memory issues. Models generally not as good as deep models trained on enough training data (but can be better for cases with not a lot of training data).